Upgrading a 3D Printer with A Leadscrew
Published on:27 Nov,2015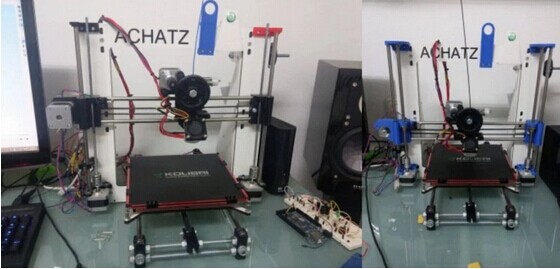
Consumer 3D printers have really opened up the floodgates to personal at home fabrication. Even the cheapest of 3D printers will yield functional parts — however the quality of the print varies quite a lot. One of the biggest downfalls to affordable 3D printers is the cost cutting of crucial parts, like the z-Axis. Almost all consumer 3D printers use standard threaded rod for the z-axis, which should really use a leadscrew instead.
Threaded rod is not designed for accurate positioning — it’s primarily designed to be a fastener. You can have issues with backlash, wobble, and they usually aren’t even perfectly straight — not to mention they gunk up easily with dirt and grime. In other words, you’ll never see a threaded rod on a commercial machine.
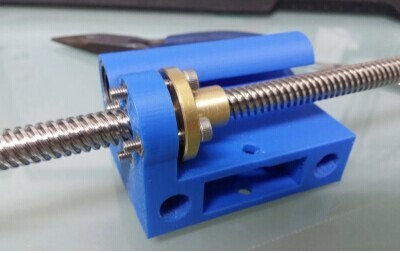
leadscrew
Enter the lead screw. Lead screws are precision machined components used for pretty much all proper CNC equipment. They have almost no backlash, they’re perfectly straight, and they allow for higher load transfers without jamming.
In order to upgrade his Prusa i3, [Daniel] designed and printed his own z-axis carriages to use with the lead screw.
If you have a Prusa i3 too, he’s uploaded the design files to Thingiverse. And there’s plenty of info on his blog with instructions on how to do it.